
Brett St. Clair shares tips for purchasing your first touring setup in the second of six columns.
The most important advice about your gear as a new backcountry skier is to try it out and get to know how to use it before you get deep into the backcountry, particularly if you are launching off for a multiday trip. It’s fairly common to run into gear problems the first time you use brand-new or unfamiliar gear.
A great resource for learning about gear options is Backcountry’s annual Gear Guide, which is published each fall.
Skis

Skis are getting better and lighter all the time. Your ski choice should be guided by where you live and where you’ll do most of your backcountry skiing. If you have friends who backcountry ski tour, ask them for advice about what to look at.
The eastern philosophy, follow the middle way, is a good guide for selecting your first pair of backcountry skis. Unless you are trying to specialize, don’t go too skinny and light or too fat and heavy.
As a general rule, the longer, wider and bigger the ski the more it weighs and the better it floats in deep snow. The smaller the ski, the less it weighs and the less effort it requires to move uphill.
The right ski length for you is generally determined by your weight not your height (remember to add in the weight of your pack) and to some extent whether you ski primarily in tight terrain (trees) or open bowls. Manufacturers often list recommendations about this, and your local shop is a great resource here.
If you live in the West where the powder is deep and dependable (like in Utah, Wyoming or British Columbia), your best first ski choice would probably be in the 100-106mm range. If you live in the icy East (like in Vermont or New Hampshire), your best first choice might be in the 95-100mm range.
Ideally, you demo skis before you purchase them (check out Backcountry Basecamp, a traveling tour with free demos from partner brands). If there isn’t a Basecamp stop near you, typically few opportunities exist to try out backcountry skis. Most of us tend to follow the herd and buy what our friends like or read reviews and make judgments from those.
Most experienced backcountry skiers (just like experienced alpine skiers) eventually own more than one pair of skis for use depending on their intended mission or conditions.
Bindings

Touring bindings range from heavy freeride bindings that feature safety release functions much like alpine-style bindings, to super-light minimalist speed touring designs. All generally work well for their intended style of skiing, and we’ve found them fine for inbounds use too.
Freeride bindings (±1,800 grams/pair) have an alpine-binding-style heel piece and can be used with either touring boots or traditional alpine ski boots. The downhill performance is similar to an alpine-specific binding. The weight is problematic for day-after-day touring.
Traditional “pin” or “tech” bindings (± 900 grams/pair) are the middle way of AT binding choice and are what most skiers use. They are lighter, which helps going uphill with less effort, and provide solid downhill performance. While they do have adjustable release settings based on weight and skier experience (DIN or release value) the heel release is not as reliable as an alpine binding.
Superlight pin bindings are the skimo racers’ choice and provide surprisingly solid performance given their minimalism.
Unlike alpine bindings, which are designed with ski brakes that deploy when the binding is released, you can opt for a backcountry setup with no brakes to save a little weight.
Boots


Your enjoyment of ski touring will depend more on your boots than any other piece of gear. More important than the type of boot you choose is finding a pair (or tweaking them) so that they fit snugly and comfortably and don’t give you blisters or other foot problems.
Remember, you’re spending 90% of your time walking uphill, so the mental model is as much hiking boot as it is ski boot.
Alpine touring boots have mechanical locks to switch easily from ski mode—in which the upper cuff is fully rigid (like an alpine boot) for control during the descent—to walk mode in which that cuff flexes and offers more freedom of movement during the ascent.
Backcountry boot choices range from alpine-style rippers (3,600 grams/pair) that can drive big skis and still tour, to lightweight models (± 1,800 grams/pair) featuring a bigger range of motion in walk mode at the expense of less downhill control.
Boots typically are assigned specs by their manufacturer that define the boot’s stiffness or “flex” in downhill mode and its range of motion in walk mode.
On the heavier end, a boot with a 130 flex rating and a 50-degree range of motion (ROM) indicates a fairly stiff boot with solid downhill control and acceptable uphill capability.
A boot with a 95 flex rating and 65 ROM will typically be the choice of someone looking to make time going uphill and who is willing to sacrifice downhill performance to do it.
A boot in the midweight (± 2,700 grams/pair) range will typically combine moderate range of motion in walk mode and a flex of 110 to 120 to offer solid downhill performance.
Flex and range of motion ratings are somewhat subjective, but when combined with the weight of the boot, they do give you a good indication of its potential performance.
Boots are built with last widths ranging from approximately 99mm to 103mm. Depending on the width of your foot, you may find a better initial fit within a boot category based not on brand, but on the last width of the boots the brand manufactures in that category.
Boots are commonly modified or tweaked to fit an individual user more comfortably. This may include heat molding the liner to your foot or installing custom footbed orthotics. A good bootfitter is well worth what you’ll pay them.
If you use footbeds in your alpine boots or orthotics in your running or street shoes, you are going to need them in your backcountry boots. Try boots on in the shop with your orthotics or footbeds in place. It can be problematic (but not impossible) to install custom footbeds in boots you’ve sized and bought without them, so keep that in mind.
Do not burn your local ski shop by trying on boots there and, after finding your correct size, ordering them on the Internet. Not only is this sleazy, it is very bad karma. And one thing you do not want to invite as a backcountry skier is bad karma.
Boots, skis and bindings are typically matched for the predominant type of skiing you plan to do. So, if you’re a mountain runner who intends to ski light and fast, you’d match a lightweight boot with a featherweight binding and ski.
A middle way backcountry skier could safely match a midweight touring boot with a touring ski that’s a good pick for the snow conditions where they live and a standard tech binding.
Climbing skins

The humble climbing skin is what makes backcountry ski touring possible. Like the soles of your shoes, you don’t really think much about them—until they fall off.
Our advice about buying local again rings true when it comes to climbing skins. You need to make sure the length is correct for your ski, and with the advent of big, modern-shaped skis, climbing skins need to be trimmed to closely fit the contour of your ski’s shape.
Skins are made using natural mohair or nylon or combinations of the two. Mohair is generally considered to glide more easily but wear more quickly. Nylon can feel a bit slower but lasts longer. Going with a blend of the two is a sound choice.
Trimming skins is not particularly complicated, and after you have been at this for a while you can tackle it. But if you are new to it, check out skins at the shop, have the shop employee make sure the length is right, and then let them trim the skins for you. They do it for free. That way, if they blow it, the mistake is on them and not you.
Poles
Poles are pretty simple. Most backcountry skiers use adjustable, two-section poles or tall poles with extended grips. The idea is that if you’re touring on a steeper slope you can adjust your poles/grip so you’re still getting appropriate contact with the snow on both poles. If you are skiing deep powder snow, adding powder baskets is a good idea. You can usually purchase and install a set separately if they didn’t come with the poles you bought.

Most backcountry skiers do not use pole straps. There are two reasons for this. One, if you have the misfortune of being caught in an avalanche, you do not want your arms to be tangled up in your ski poles which will drag you deeper into the snow. Second, it’s not a good idea to use the straps while tree skiing in case a branch snags your pole basket, thereby ripping you off your feet and potentially injuring your shoulder.
As a result, some people totally remove the straps from their touring poles. This does make fully engaging your tech binding toe latch and flipping the heel risers a bit easier, but whether you keep your straps or not is a matter of personal preference.
One final thought. The adjustable pole is a hallmark of backcountry skiing, but for the most part, skiers generally set a length and forget about it. If you want to save a few bucks you can probably use your tried-and-true alpine poles as long as the length feels okay and they have powder baskets.
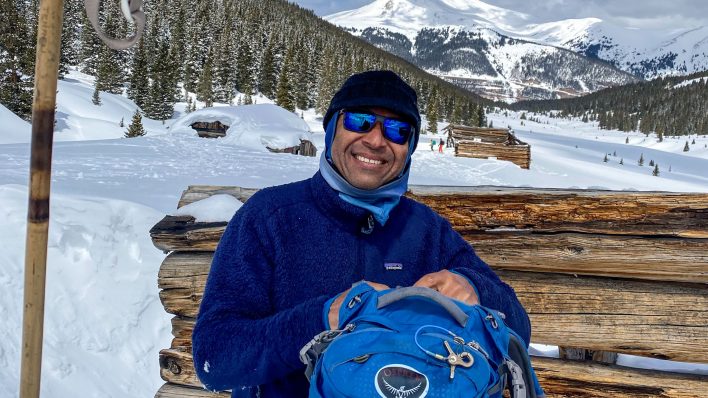
Brett St. Clair, alongside Craig Evanoff, is the author of Tips for Beginning Backcountry Skiers. He can be reached for questions or comments at brett@wskyline.com. He hopes to share what he has learned in a lifetime of backcountry skiing with those just getting into the sport.


Related posts: