One can measure a successful tour in many ways. Whether it’s skiing a new line, finding fresh stashes or coming home safely, it all starts with a strong plan.
For internationally certified guide and founder of Adventure Spirit Kel Rossiter, planning starts with people: “You can’t plan an objective until you know who your team is,” he says. Consider skill set, touring background, level of fitness, interests, risk tolerance and priorities. Additionally, knowing how partners prepare themselves (i.e. were they out at the bars until 2 a.m. or are they showing up rested and well-nourished) is valuable to know, too.
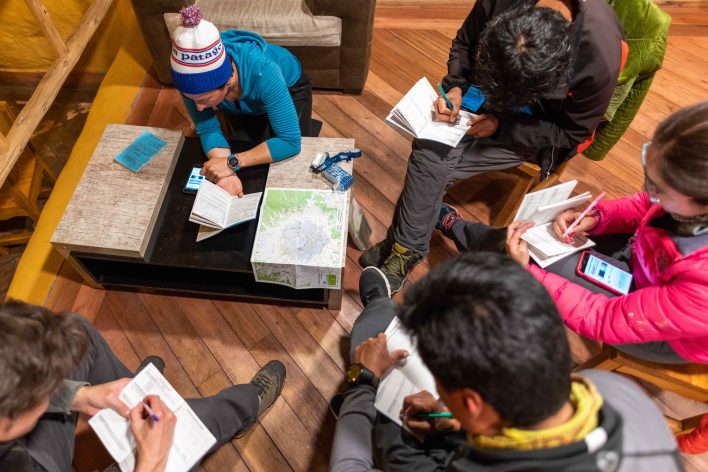
Juliana García plans with a group of avalanche students while teaching in Cotopaxi National Park, Ecuador. [Photo] Esteban Berrera
Once you’ve solidified your backcountry buddies, share the planning with your team. Rossiter acknowledges that delegating responsibility to the person who has the most local knowledge or experience is an easy pattern to fall into, but he says sharing the job “makes your own workload easier, and it gets everybody more tuned into what’s actually going to be happening in the field when we get there.”
Whether looking at his home mountains or a new destination, Rossiter checks the local forecast daily, even when he’s not in the field. Step 2? “Consider the time of year you will be going to that place.” Once you establish a frame of reference for conditions, begin route finding. “The best way to avoid problems is to have multiple plans,” Rossiter says. He recommends creating a palatable plan B (and even C), so you’re happy to switch from plan A should conditions and/or group dynamics require it. For Rossiter, that means turning to digital mapping apps to learn about aspect, elevation and slope angle in the relevant terrain.
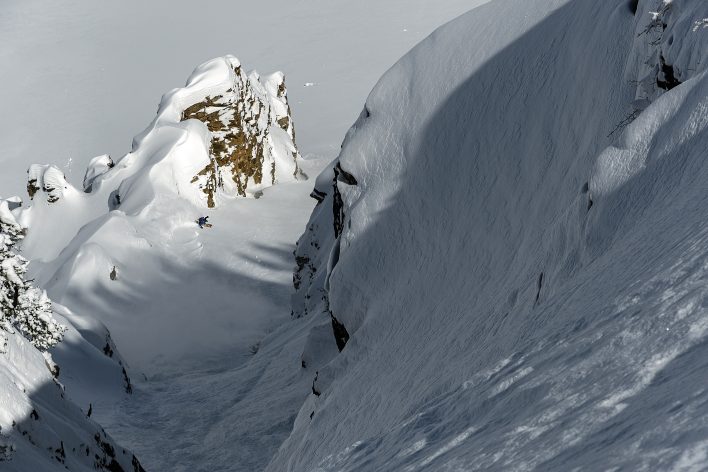
On Little Cottonwood Canyon’s Emma Ridge, Drew Petersen checks on his call to turn around near a cornice. Looks like he was right to do so. [Photo] Sam Watson
Rossiter suggests organizing your terrain navigation according to legs. Timing can be crucial for safe touring—especially when sun exposure increases avalanche danger. By planning with legs, you can track your progress against the clock. “If leg one of the day was going to take two hours, and suddenly I’m realizing it took us three hours…I might reconsider how deep into that tour I want to go,” Rossiter says. Using CalTopo, you can calculate the timing of legs as you create them using the Munter calculation—an equation that factors in distance traveled and elevation gained to produce an estimated time of travel—that’s built into the software.
Fellow internationally certified guide and owner of Alpine Guides International Mark Puleio echoes the idea of legs and adds in a system for his field book. He labels each leg with a number (i.e. 1.1, 1.2, 1.3, etc.) and its corresponding elevation, Universal Transverse Mercator marks, the bearing to follow and length to follow it for. “Call me old school,” says Puleio, but he likes to know he can always rely on a map and compass should technology fail.
Even with all this preparation, when the time comes to hit the skintrack, Rossiter doesn’t expect to follow his plan blindly. Rather, “the plan is the point from which we deviate from,” he advocates. No matter the original idea, decisions in the field must be made according to what you observe when you get there.
This article was originally published in Issue No. 150, The Skills Guide. To read more, pick up a copy, or subscribe to read stories like these as soon as they are published in print.

Related posts: