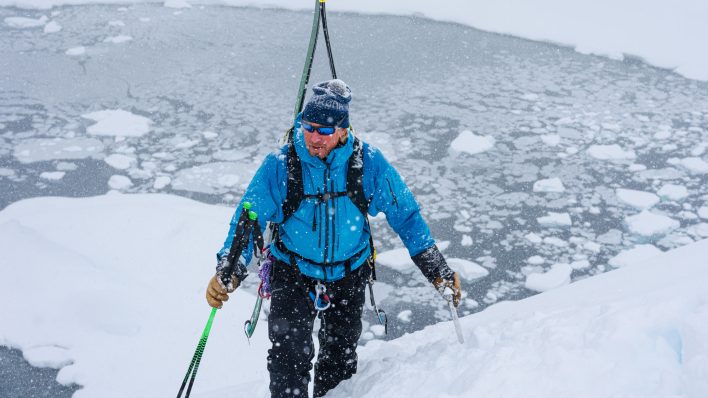
When considering avalanche rescue, everyone knows to carry the basics: beacon, shovel and probe. And when we practice our rescue skills, the focus often lies just on the beacon search. Once you have recovered your partner from the snow, however, it’s pretty unlikely that they will pop up ready for another lap—chances are they’ll have an injured or body part, maybe worse. The final stage in a rescue is often overlooked during traditional avalanche courses: how do you get someone out of the backcountry who is unable to ski? Many people often fall back on the hope for a heli evacuation, but bad cell service, inclement weather and difficult terrain can make this impossible. When this is the case, you’re going to need to make a sled.
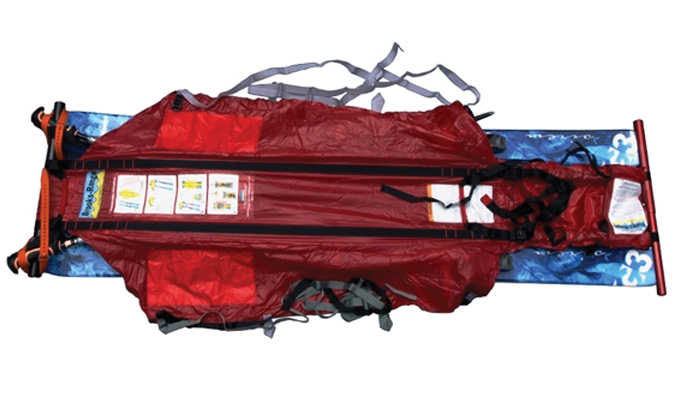
The Brooks Range Ultralight Rescue Sled, comprised of ski poles, skis, and well-placed straps.
Historic Sleds
Back in the day, skis built for backcountry skiing were denoted by holes in the tips and tails. These holes were intended to allow for the construction of an improvise rescue sled by tying the tips together and fashioning your shovel handle into a seat tied to the bindings—and away you go. These days, several manufacturers make super light, packable and multi-functional rescue sleds that are easy and fast to build. The reasons for not carrying one are diminished to almost nothing.
The Blown-Knee Scenario
Last season, while instructing an AMGA Ski Guide Course in Crested Butte, Colo., I ran into some friends skiing a similar slope. A half hour later, I got a text asking if I was still in the area because one of my buddies hit some bad snow and blew his knee—not an avalanche event, but an all-too-common injury. My team of students and I were 600 feet uphill of the injured party and prepared with warm clothing, medical kits, ropes and a Brooks Range Ultralight Rescue Sled—a kit comprised of a lightweight tarp, aluminum spreader bars and a couple Voilé straps used to attach the injured party’s poles and skis to the tarp. The whole package weighs 24.9 oz. We skied down to the group and, within 20 minutes, we had a splint on and warm cloths on the injured person and the sled built and were moving toward the trailhead.
Making Burritos
My preference is toward the slightly heavier but much easier to use drag-bag burrito-style tarp like Brooks Range’s Eskimo Rescue Sled, which is a no-frills sleeping-bag-shaped sack you can stuff your broken buddy into quickly. These typically have two slots to feed skis into; place the injured party on the tarp, wrap up the materials and away you go. And while you can save about a half-pound by using the ultralight sleds, they take more practice and experience to make sure they don’t come undone in the middle of a rescue. Other models and modifications allow you to share pieces such as shovel handles that work as the sled spreader bars.
Practice Makes Perfect
Much like avy burial scenarios, it’s important to practice making sleds for personal evacuation situations. Real world (i.e. in the snow) practice tends to highlight system weaknesses, like not tightening straps enough or how different skis can create new issues with the system each time you put it together. The drag-bag sleds are much more accommodating for different ski and splitboard shapes, and can even be used without skis entirely.
Rope Up
Additional items may be required to build and move a rescue sled depending on the terrain you’re traveling and what else is in your kit. Consider including a rope to lower a sled down steeper terrain or to drag it across flatter terrain. A one-half-length sleeping pad can also be helpful as a splint or as padding and additional insulation in the sled. Other items well utilized in a rescue include the injured party’s backpack and extra layers to make a backrest for the bumpy ride out.
Bottom Line: Take a hard look at your pack and put some consideration into your rescue kit. Rescue sleds can go a long way toward keeping an unfortunate event from becoming a life-threatening night in the woods. Talk with your ski partners and share the costs and pack weight, and make sure you’re packing the items you need to get home safely. If two- to three-pounds is the difference between sleeping in a snow cave or getting back for après, then adding a little weight may be a good way to ensure your group’s safety.

This is great advice however I think the article leaves out the best advice which is being prepared to wait for an organized rescue team to arrive. These improvised sleds do work but they’re hard on a patient with serious injuries and difficult and tiring to drag uphill, across flats or even downhill in deep snow. Better to carry a satellite beacon to summon help if you’re out of cell coverage and the gear to wait it out until help arrives (sleeping bag, pad, stove, mega mid etc.). But it’s best to have all of the options (rescue sled, bivy gear, and communications0 since you never know what you’ll be confronted with.
Since Brooks Range went out of business this week – what other sled options do you recommend (other than 100% DIY)?
That’s news to us! We’ll dig in for more information on other options.
Alpine Threadworks is run by a ski guide in Canada and they make rescue tarps – http://www.alpinethreadworks.com/products/sledkit.html
Check out Snap Evac. The base model snaps directly into AT pin tech bindings to make a self-evac or assisted evac sled.
It was designed to be able to be used without prior knowledge of assembly for the layman back country skier.
Thus, Snap In and Evac Out.
A bivy/wrap attachment will be included with their next model for a fully packaged rescue system.
http://www.snapevac.com